Contents
Do your Crocs feel a little… basic, and are you looking for instructions on how to paint crocs? Whether you are a beginner or an experienced DIY pro, VivaCrocs will guide you through simple and awesome ways to transform your Crocs from plain to amazing.
How To Paint Crocs: 5 Surprising Ways You Need to Know
Crocs are everywhere these days. These items are comfortable, but they can be quite plain and boring. Let’s explore creative techniques to change how it looks with us!
Method 1: Acrylic paints
You just need to have these materials:
- A pair of crocs
- Angelus Leather Preparer and Deglazer
- Sandpaper (400 grits)
- Adhesion Promoter spray
- Angelus Acrylic Leather Paints
- Angelus Acrylic Finisher (Satin)
- Paint brushes
- Red Volume tape
- Newspaper (or cardboard).
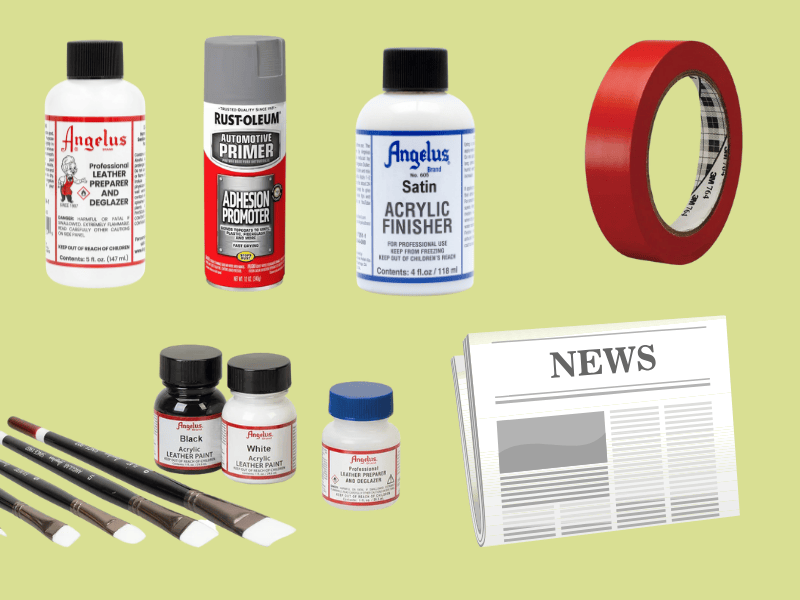
This is everything you need (Source: Angelus)
Let’s begin!
Step 1: Just like cleaning shoes before painting, we are starting by using a clean cloth and wiping down the crocs with Angelus Preparer and Deglazer.
Step 2: Next, we will sand the croc surface rougher, giving the paint something to grab onto. We don’t want it too rough, just a little textured (400 grit sandpaper).
Step 3: Now, we will spray the Adhesion promoter, so head outside. Give your crocs a few thin coats (let it get a little sticky between coats).
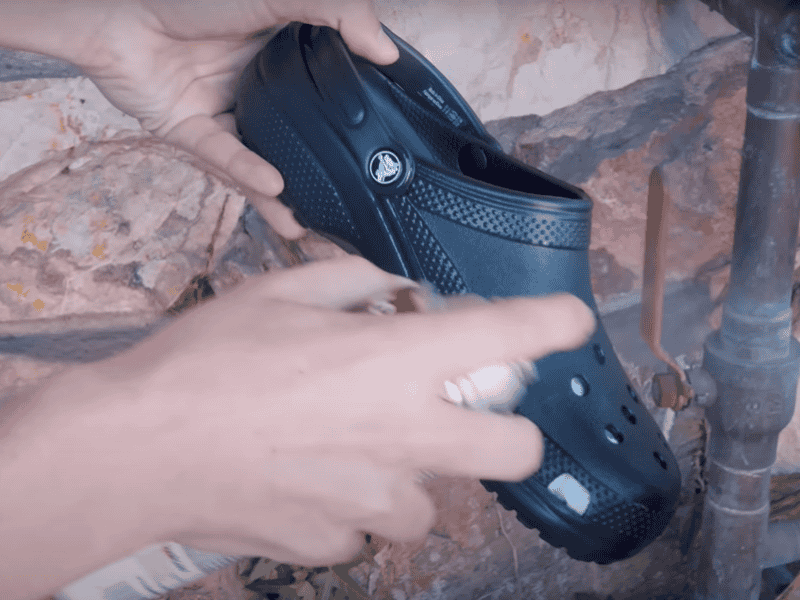
Follow the directions on the can for drying time and how far to hold the can when spraying.
Step 5: Now, paint whatever designs you want on your crocs.
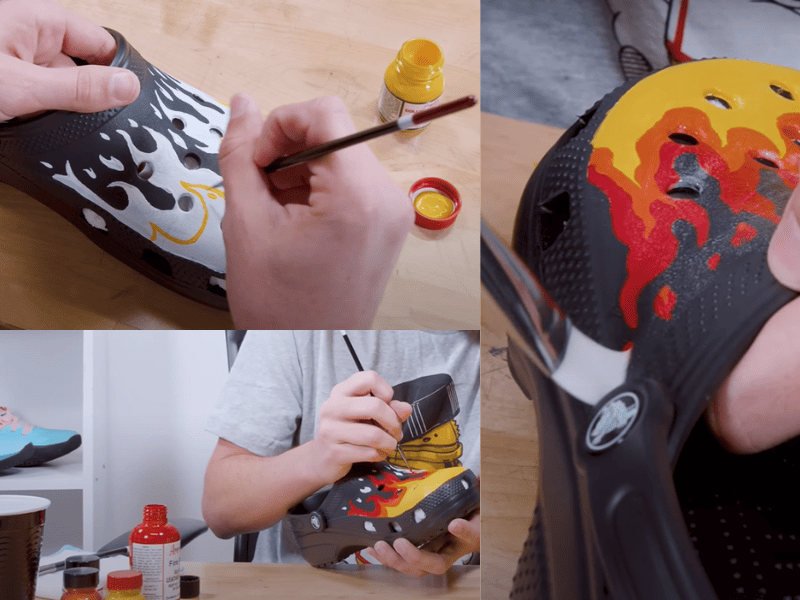
Stripes, blocks of color, patterns, whatever you can imagine! Take your time, and have fun.
Step 6: To finish things off, we will use Angelus Satin Acrylic Finisher to even out the finish and add protection to the paint. Apply a few thin coats and let it dry between coats.
Step 7: Let your painted crocs dry completely. Wear your painted crocs gently at first to see how the paint holds up over time.
Friendly tip: It’s not sure how well paint will hold up on crocs, so you should stick to simpler designs that won’t be as noticeable if there’s a little cracking or wear.
Method 2: Posca Marker
This method is easy to do, and you only need a few basic supplies:
- Plain crocs (choose any color you like)
- A set of Posca paint markers
- Adhesion Promoter spray
- Matte Finish spray
- Sandpaper (400 grits)
- A pencil
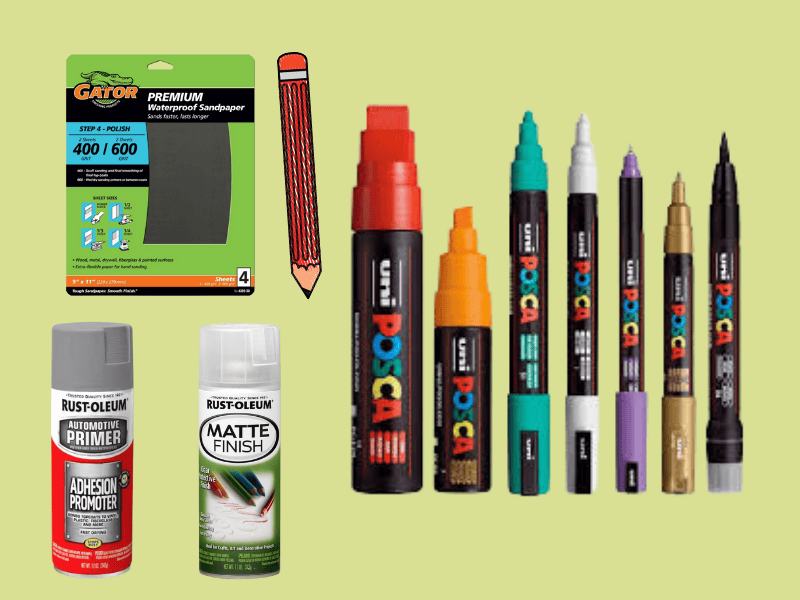
Don’t worry if you’re new to customizing – this is designed for beginners! (Source: Xavier)
Step 1: First, we will clean and sand the croc’s surface so the paint adheres well.
Step 2: Now comes the fun part – take your pencil and lightly sketch what you want to paint on your crocs.

Drips, patterns, characters, words – let your imagination run wild
Step 4: Grab your Posca markers and get ready to paint! Paint slowly, following your pencil sketch. Also, you can layer colors (let one layer dry a little before adding another).
Step 5: Outline all your designs so they will look cleaner and better. Don’t forget to seal your crocs with Matte Finish spray in thin coats.
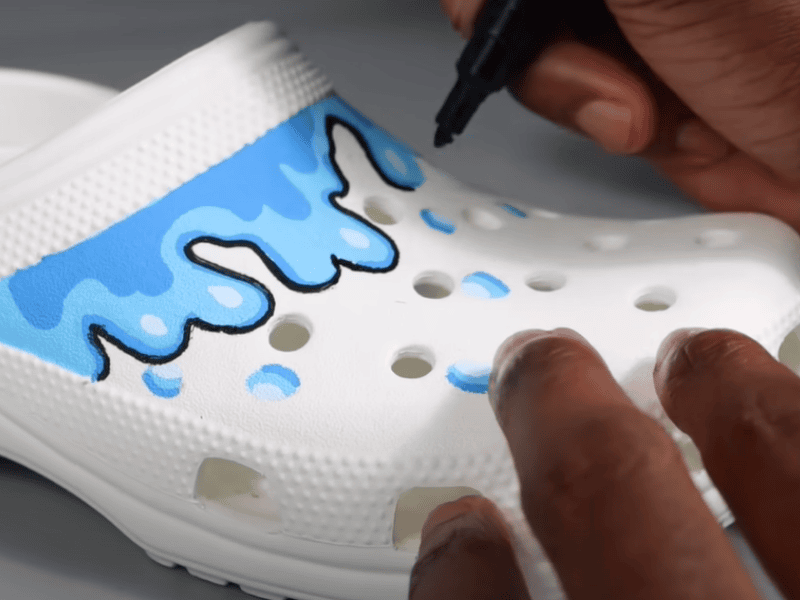
Think of it like coloring in a coloring book but on your crocs, so take your time and enjoy the process.
Here are a few small hacks for you:
- You can practice your design on paper first to get a feel for the Posca markers.
- If you’re using light and dark colors, it’s usually easiest to start with the lighter colors and then add darker colors on top.
Method 3: Spray paint
Color-changing spray paint is like something out of a movie, and it’s surprisingly easy to use on your crocs! This method will transform your crocs and give them a super cool look.
You have to look for these simple materials:
- A pair of plain color crocs
- Krylon Color Changing spray
- Adhesion Promoter spray
- Red Volume tape
- Sandpaper (400 grits)
- Gloves
- Matte Finish spray
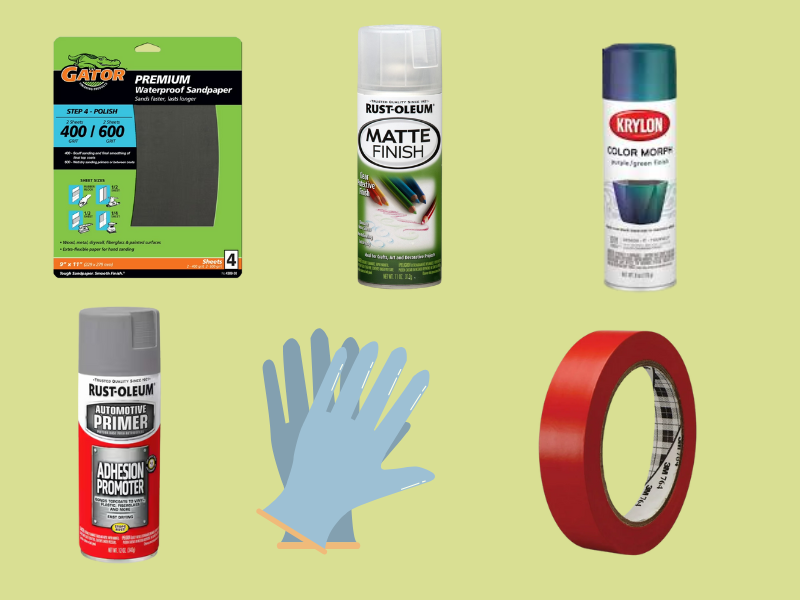
This is everything you will need for this method.
Let’s Get Started!
Step 1: First, clean the surfaces and lightly sand all the areas of the crocs you plan to spray-paint. Again, a light sanding is all you need.
Step 2: Next, if there are parts of your crocs you do not want to be color-changing, tape them off with your red volume tape.
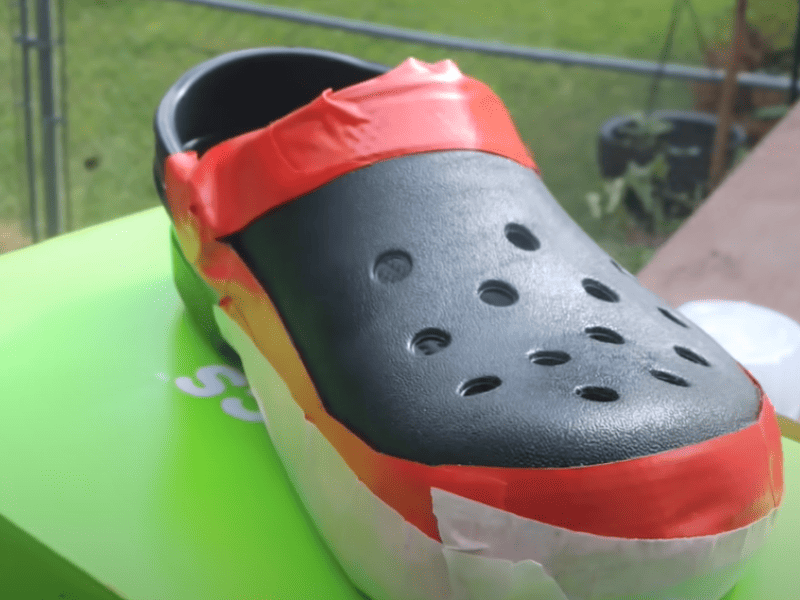
Make sure the tape is stuck down firmly to create clean lines (Souce: Jenna Marbles)
Step 3: Wear your gloves because we need to use an Adhesion Promoter. This spray helps the color-changing paint stick to the crocs and prevents peeling or scratching off easily.
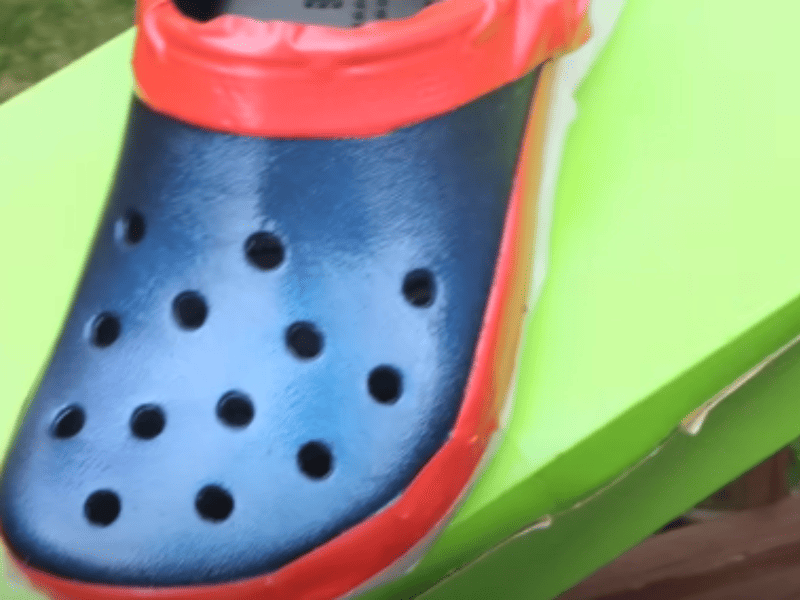
Follow the directions on the can for how far away to spray and the drying time.
Step 4: Now for the cool part – the color-changing spray paint.
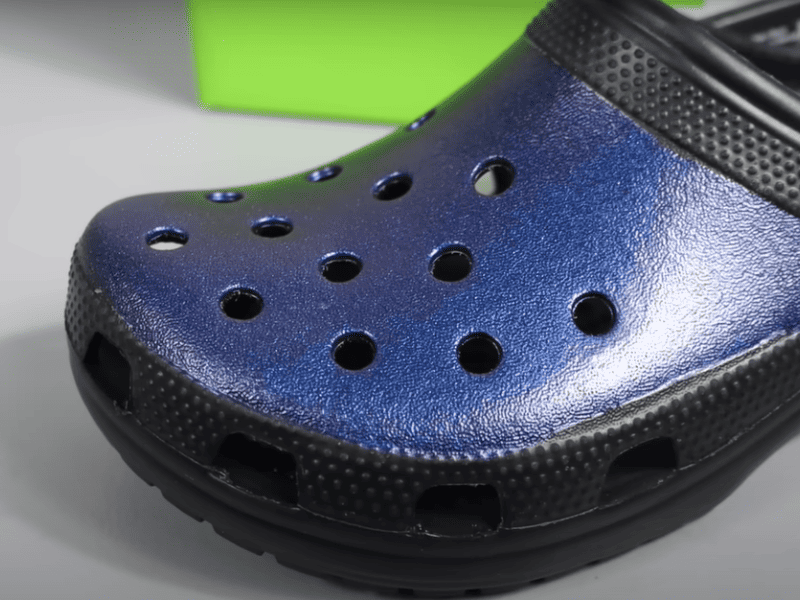
You will see it start shifting from blue to purple and other colors – so cool!
Pro tip: Keep repeating these light coats, letting it dry in between each one until you get the color-changing effect you want.
Step 5: Give your crocs light coats of the matte finish spray, letting it dry between each coat to make your custom crocs last longer.
4 Tips To Help Your Workflow Easier:
- Always spray paint outside or in a very well-ventilated area. Wear a mask to be extra safe!
- Don’t try to cover everything in one thick coat, or the paint might get runny or not dry properly. Let each coat dry fully before adding the next.
- Before you spray your Crocs, do a test spray on a piece of cardboard or paper to get a feel for the spray paint and see the color change in action.
- Always read and follow the directions on all of your spray paint cans for best results, drying times, and safety tips.
Method 4: Hydro Dipping Your Crocs
It sounds fancy, but it’s surprisingly easy to do since you are just floating spray paint on water and then dipping your crocs right through it – creating a wild, one-of-a-kind design! Let’s get ready to make some seriously cool crocs!
Before we start, we need to prepare a few things:
- Plain lighter colored crocs
- Krylon Color Changing spray
- A large container
- Warm water
- Adhesion Promoter spray
- Clear Top Coat sealant (acrylic or enamel)
- Red Volume tape
- Sandpaper (400 grits)
- Gloves
- A stick
Let’s Get Started!
Step 1: Just like with the Posca markers or spray paint, clean and lightly sand all the parts of your crocs. If you want to keep certain parts of your crocs, use tape to cover them up now.
Pro tip: Press the tape down firmly so no paint seeps underneath.
Step 2: Bring your container outside (somewhere with good airflow), then fill it with warm water. This helps the spray paint spread out better on the surface.
Step 3: Before the dip, we need to use an adhesion promoter. Follow the can’s directions for how far to hold the can and how long to let it dry (usually just a few minutes).
Step 4: Now for the cool part! Spray spray paints directly onto the surface of the warm water.
Pro tip: You can use a stick to gently swirl the paint around on the water’s surface to make cooler patterns.
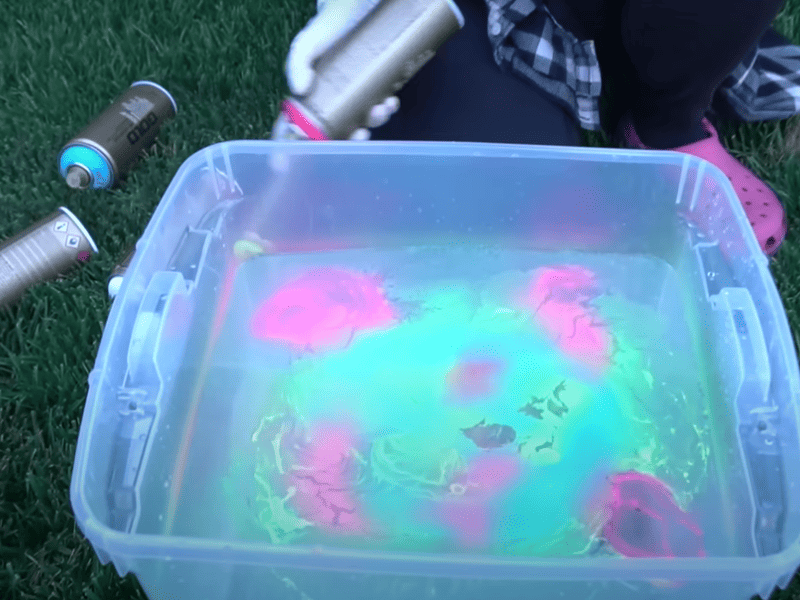
Don’t spray in one spot for too long – move the can around.
Step 5: Now, take one croc and hold it at about a 45-degree angle and slowly dip it through the water’s surface one time only. Ensure the whole croc gets submerged through the paint layer.
Step 6: You can rinse your crocs lightly with a little bit of cold water after dipping them, but do not scrub too hard because it will mess up the paint design! Some people skip rinsing, too.
Step 7: Now, let your crocs dry completely for several hours or even overnight.
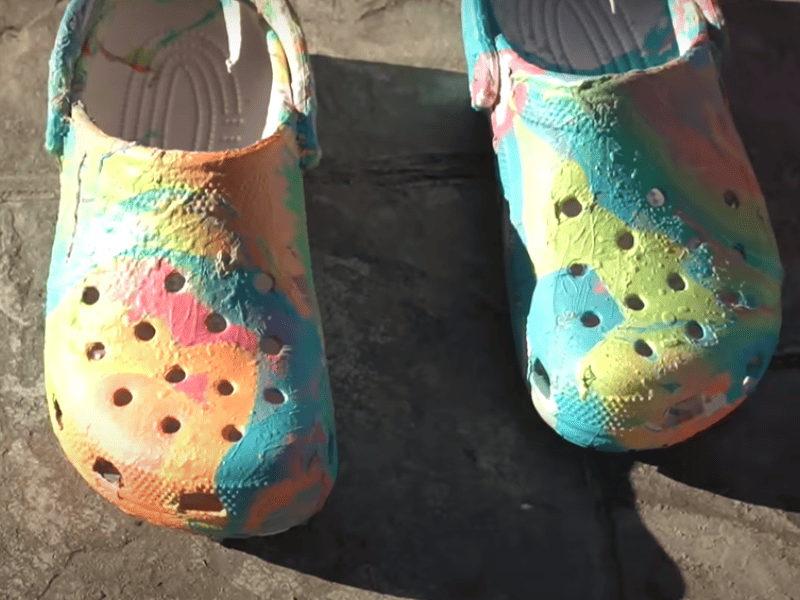
Ensure your crocs dry completely.
Step 8: Now you can protect your crocs’ design with a clear top coat sealant spray. Do several light coats of the clear sealant spray, letting each coat dry in between.
Method 5: Did You Know That You Can Dye Your Crocs?
Want to change your Crocs color in the easiest way possible? We only have a few simple materials to prepare:
- Plain light color crocs (white works best)
- Your favourite color Rit dye
- Hot water, but not boiling
- A big pot or a container (big enough to dunk your crocs)
- Gloves
- A stick
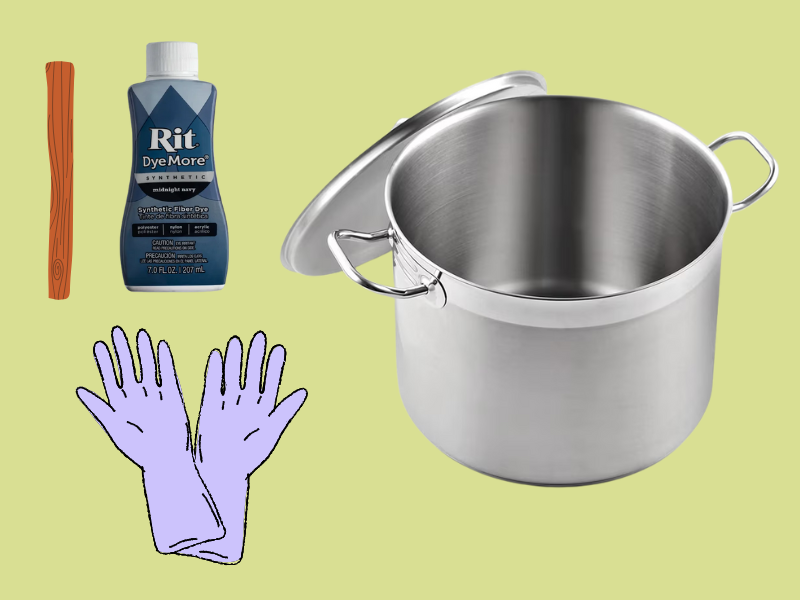
This is seriously the most straightforward method – just mix dye in hot water and dip your crocs.
Step 1: First, fill your container with hot water (warmed on the stove but not boiling).
Step 2: Pour your Rit dye into the hot water and stir it up well.
Step 2: Put on your gloves, then dunk your crocs into the colored water (lift your crocs to check to see how the color is changing).
Step 3: Once you like the color, take your crocs out and rinse them under cool water until the water is clear, then leave them dry.
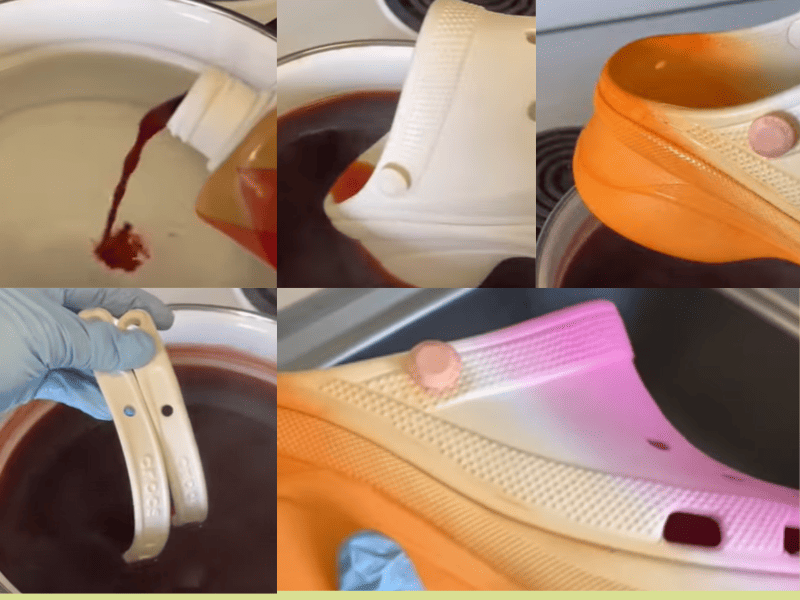
Make sure they are dyed evenly (Source: Cait)
We have a few tips to make this easier!
- Hot water helps the dye to soak in.
- Add more dye to the water if you want a bright or deep color.
- The longer they soak, the darker they get; a few minutes is good enough.
- Gloves can prevent the dye from staining the hands.
3 Extra Tips To Help Your Custom Crocs To Last Longer
- You can consider using Mr. Super Clear (Primer & Sealant) and Liquid Kicks (Extra Durable) to finish the final coat for long-term lasting on your crocs.
- Dye lasts longer than paint, you can use SEM Vinyl Dye instead of Rit dye since it is a special dye for vinyl/rubber-like crocs. You can find it at auto parts stores.
- You can use the hair dryer to speed up drying paint/sealant layers; remember not to overheat it.
This is the end of our article. We hope this guide has shown you just how easy and interesting it is to customize your plain crocs. And who knows, you might just create the coolest, most unique pair of crocs.
FAQs
1. Do I Have To Use A Primer To Paint Crocs?
No, but it’s highly recommended. Primer significantly improves paint adhesion and durability on crocs’ material, making your design last longer.
2. Should I Clean Crocs Before Custom My Crocs?
Yes, absolutely! Cleaning is essential to remove dirt and oils so that paint can stick properly to your crocs.
3. Can I Combine These Methods To Decorate My Crocs?
Yes, you can! (like dyeing crocs a base color and then adding Posca marker designs), but please do research and test on a small area first to avoid unwanted damage.


